9.27.2009

Oatmeal Cookies and Carrot Muffins


Cooler weather is finally here and I've had a low-key weekend, so last minute flights of baking fancy are known to occur. In the true spirit of my name (Demetria, after Demeter, Greek goddess of the harvest), I used some of the bounty early fall provides. Dinner last night was roast chicken with carrots and potatoes tossed in the crockpot and allowed to go for several hours on high. The resultant stock will be used in potato leek soup.

As for the title of this entry, I have been craving a soft, chewy oatmeal cookie for a couple of weeks now. The past couple of recipes we've used resulted in disappointment. Not enough chew, insufficient spice. I was bound and determined to be satisfied this time. Thankfully, I was. They are flavorful and soft, with the added bonus of containing only 4 Tbs. of butter for the entire recipe. I changed the base recipe a bit, but only in that I added more spices. Below, I used approximations of what I did.

The carrot muffins were simply an idea I had and went hunting for something that would be substantial in flavor and, again, changed things around to suit me better. They came out of the oven maybe 20 minutes ago and Luke has already eaten 2. They are not overly sweet (which is why I included the original amount of sugar for those with a sweeter tooth) and would be wonderful with some butter and honey and a steaming cup of chai.

Soft and Chewy Oatmeal Raisin Cookies
(350* 13-15 mins.
makes 3-4 dozen)
4 Tbsp. butter, melted
1 c. brown sugar
1/2 c. white sugar
1 egg
1/2 c. chunky applesauce (I used homemade)
1 t. vanilla
1/2 t. cinnamon
1/4 tsp. cloves
1/4 tsp. ground nutmeg
1/4 tsp. salt
1/2 tsp. baking soda
1/4 tsp. baking powder
1 1/2 c. rolled oats
1 1/2 c. flour
1 c. raisins
1/2 cup nuts (I chose pecans)

Preheat the oven to 350. Line 2 baking sheets with parchment paper. In a bowl, cream melted butter and both sugars. To that add egg, applesauce and vanilla, stirring to combine. In a separate bowl, mix together remaining dry ingredients, including nuts and raisins. Pour wet ingredients into dry and stir until combined.

Drop by rounded tablespoons onto baking sheets and bake for 13-15 mins. each. The centers should still be a bit soft, but the edges set. When done, allow to sit on the baking sheet for 5 mins. and then transfer to a wire rack to cool (if you can keep from eating them still warm).

Carrot Spice Muffins
(350* 15-20 mins.
makes 18 or so)

2/3 lb. carrots, grated
3/4 c. applesauce
1/4 c. canola oil
1-2 tsp. vanilla
3 eggs
2 c. flour (I used half white, half whole wheat)
2 tsp. baking soda
1/4 tsp. salt
2/3 c. sugar (I used half brown, half white and reduced from 1 1/4 c. total)
1 1/2 tsp. cinnamon
1/2 tsp. each cloves, ginger, cardamom and nutmeg

Preheat oven to 350 and grease or line a muffin tin. In one bowl, combine carrot, applesauce, eggs, oil and vanilla. In another, combine the dry. Add wet to dry and mix just until moist. Spoon into muffin tin and bake. When done, allow to sit in tins 5 mins. or so before allowing them to cool on a wire rack.


9.26.2009

Lazy, lazy blogger...

I have been remiss lately, as life has been keeping me out of the kitchen. Plus, when I'm actually cooking, I haven't been thinking to photograph the results.

The above photo is one of my crisper drawer. It is full, clearly, of potatoes and carrots and we have easily that many more of both in the main body of the fridge. Our CSA is winding down and they've had a bumper crop of both carrots and potatoes. So many, in fact, that they're harvesting twice what they projected and are doling out double portions every week. Just this week, we received 3 pounds of carrots and 2 bags of potatoes, each a different variety. There is also a standard sized paper grocery bag of apples in there, 2 large bags of green beans, 8 or so ears of sweet corn and a bucket load of squash.

We plan dinners through a weekly menu. It helps us to keep grocery bills down and eliminates last minute runs to the store. Plus, we know what we'll be having on a given night and it eliminates the interminable "What do you want for dinner?", "I don't know, what do *you* want for dinner?" back and forth that used to be so common around here. Having all necessary ingredients on hand allows for switching around, so if we're not feeling like one thing, we can choose another.

This week, potatoes are the name of the game. For breakfast this morning I made a giant batch of home fries and some scrambled eggs. Then, on a couple of nights this week, we have planned potato leek soup and a potato, chickpea, chicken curry. There will still be a surplus, I guarantee.

Carrots tend to be a bit more of a challenge. I enjoy them both cooked and raw, but Luke prefers the former, claiming he gets tired of chewing on the raw. I know plenty of things to do with them, but they seem to get eaten less. It's something we need to work on since there's no end to carrots in sight, particularly because we signed up for a winter share (consisting of a giant size delivery once a month in November and December).

As for the rest, the apples will be turned into baked goods and eaten out of hand. The squash, more than likely, will go bad. I feel terrible about this, but it seems inevitable. The green beans, corn and broccoli will be blanched and frozen for winter. Odds and ends will have a use found for them.

8.16.2009

Bubble Loaf!

I've been wanting cinnamon rolls, but not the work it takes to make them. Bubble loaf is the closest approximation. Most people know this cinnamon-sugar sweet bread as Monkey Bread, but here in the Tatertot household, that term is verboten. Luke has a preternatural hatred of all things simian passed down through generations of his family.

This is not good for you. If you become an addict, I am not to blame, for you took it upon yourself to make and eat it.

I've made it before, but it took a lot of work, so I went with using the bread machine this time. It took about the same amount of time, but not nearly so much work.

Again, I am a cheater when it comes to bread making, but normal bread techniques apply.

Bubble Loaf
(375* 20-25 mins.
serves ?)

Dough:
1 cup water
1/4 cup sugar
2 Tbsp. butter
1 tsp. cinnamon
1 tsp. salt
3 cups bread flour
2 1/2 tsp. yeast

Delicious coating:
1/2 cup brown sugar
1/2 cup melted butter

Place dough ingredients in bread machine and set for the dough cycle. When the cycle ends, remove the dough from the pan to a lightly floured surface and knead 10-12 times. Cut dough into 1" pieces. Combine the brown sugar and melted butter in a bowl and coat all of the individual dough pieces with it, dropping each piece into a Bundt or tube pan evenly. Preheat the oven and lightly cover the dough-filled pan with plastic wrap and rise in a warm place (I put it on top of the preheating stove) for about half an hour or until it has risen to the top of the pan. Place the pan in the oven and bake for 20-25 mins.

When the loaf is done, allow it to cool slightly before turning it out onto a plate and allowing people to devour it. Some people also put a confectioner's sugar glaze on it, but I think it's just fine as is.


8.15.2009

In Spite of the Blight, Fresh Tomato Lasagna


I grew up with an Italian grandma. Garlic, basil and tomatoes are in my very DNA. That said, traditional lasagna is a lot of work. Delicious, yes, but also heavy and time consuming to make. Traditional lasagna is the sort of thing I crave when the leaves start to turn and the low spots bear frost in the morning. Fortunately for me, I have a wonderful friend who is also a wonderful cook. Molly Belle was my high school best friend's aunt and she would have the two of us over to her apartment in Cambridge (Massachusetts, y'all), take us to art-house movies and feed us artisan bread and spectacular dinners. This recipe is one she made us back in 2000 and it's been since then that I've had it. I'm making it tonight.

This morning I woke up and had to have this. We ran out to the smaller (better?) Hilldale farmer's market and grabbed an enormous bunch of basil, several plum tomatoes ($1.50/lb.!), some scallions and a huge number of patty pan squash for just over six dollars.

Mid-summer is a time for fresh vegetables and allowing them to show off their myriad wonders of flavor. Fresh tomatoes and basil cook down into a spectacular sauce that must be sopped up with a fresh loaf of Italian bread. Better yet, there is no fussing with pre-cooking lasagna noodles (though, I admit I gave that up the day Barilla introduced their no-cook noodles anyway).

Fresh Tomato Lasagna
(400* 1 hour)

6 large tomatoes, sliced 1/4" thick
4 oz. fresh mozzarella, sliced
4 oz. fontina cheese, grated
1/4 cup fresh basil, chiffonade
1/4 cup Romano cheese, grated
lasagna noodles, as many as it takes
salt
fresh ground black pepper
olive oil

In the bottom of the dish (I am using an oblong 2 qt. Corningware) place a layer of tomatoes and sprinkle with salt and pepper. Place a layer of noodles on top, followed by another layer of tomatoes and salt and pepper. Next, layer all of the fontina, more noodles, all the mozzarella, 1/2 the Romano, further noodles and the remaining tomatoes, basil and Romano. Drizzle the top with olive oil and bake.

As I said before, it's soupy. Serve it in bowls with the aforementioned bread, buttered. This is a summer meal that cannot be beat and the ease of preparation makes it all the more alluring.

(As a side note, I had half a tomato left over, along with basil and mozzarella. I must confess to being a lifelong raw tomato disliker and know it is more a textural issue than a flavor one, but I have been teaching myself to eat them. I made a tiny Caprese salad with the remaining bits and enjoyed it thoroughly. So, to the raw tomato haters, give it a shot by taking slices of tomato, slices of fresh mozzarella and basil leaves, layering them, sprinkling with s+p and drizzling with olive oil before eating. You may be surprised. Alternately, you can take those very same things plus some Italian or French bread, turn on the broiler and have a nice little pizza.)

8.14.2009

Rustic Peach Tart


It's hot here in Wisconsin and, while I appreciate the fresh food of summer, I actually hate almost everything else about it. I'm guessing that this is due to the fact that I can't bake. I obviously tossed the no baking thing out the window yesterday, what with the muffins and all, but I loathe turning on the air conditioning and baking in upper-80s weather makes you have to.

Peaches are in season. I had to have some. I also had to bake with some. Initially I had planned to make a pie, but I didn't really want to invest that much time. Thus, a rustic (also termed free-form) tart. This can be done with any fruit or combination of things you want. I've done combinations of plum, raspberry and nectarine in the past.

Rustic Peach Tart
(425* for 45-55 mins.)

For the crust:

1 1/4 cup flour
1/2 tsp. salt
1 Tbsp. sugar
1/2 cup cold butter, shortening, lard (or combination thereof) cut into small pieces
1/8 - 1/4 cup ice cold water

Combine flour, sugar and salt in a bowl and drop bits of the chilled fat on top. With a pair of forks, pastry blender or your fingers work until you have the texture of coarse sand with some larger chunks here and there. Add water, 1 Tbsp. at a time, until dough comes together. Form a disk and place in the refrigerator or freezer until firm.

For the filling:

1 1/2 lbs. fresh peaches
3 Tbsp. sugar
1/8 tsp. kosher salt
1/4 tsp. cinnamon
1/4-1/2 tsp. almond or vanilla extract.

Wash and slice peaches and place them in a bowl with the remaining ingredients and toss gently. Let them sit until you are ready to use them.

Line a baking sheet with parchment paper and, when the crust is sufficiently chilled, roll out the dough into a rough 14" circle. Gently transfer the dough onto the parchment lined baking sheet and spoon the peaches and accumulated juice into the center, leaving a 2" - 3" border. Fold the edges up against the mound of fruit, pressing gently so the folds adhere to one another. Brush with cream and sprinkle with demerara sugar. Bake for 45-55 mins. or until the crust is golden brown and the visible juices are bubbly.

Serve warm or at room temperature with good quality vanilla ice cream.

This is the first time I've used this crust. I usually go with the America's Test Kitchen version which includes a bit of corn meal for stability. When slicing time comes, we'll see if it holds up.

8.13.2009

Zucchini Muffins


Our CSA has been churning out produce like crazy lately. It's hit full stride and I'm both overjoyed and a little overwhelmed. We've gotten tons of carrots, garlic, green beans, cucumbers, lettuce, sweet corn and now, that perennial summer veg, the zucchini. After receiving 2 last week and 2 this week, I decided something had to be done. That something was muffins.


Zucchini Muffins
(350* 20-25 mins. Makes 24
or 50-60 mins. and 2 loaves))

3 eggs
1/2 cup olive oil
1/2 cup butter, melted
1 3/4 cups sugar
2 cups grated zucchini
2 tsp. vanilla
3 cups flour (I used 1 1/2 whole wheat and 1 1/2 all purpose)
1 tsp. (heaping) cinnamon
1/8 tsp. nutmeg
1 tsp. baking soda
1/2 tsp. baking powder
1 tsp. salt
1/2 cup chopped pecans
1 cup chocolate chips, raisins, dried fruit or combination thereof

Preheat the oven to 350 and line 24 muffin cups with liners or grease and flour 2 5 x 9 in. loaf pans. Whisk together the eggs, oil, butter and sugar then add the zucchini and vanilla. In a separate bowl, combine all the remaining dry ingredients. Add the wet to the dry and stir just until moist. Fill the muffin cups/loaf pans evenly and bake until a toothpick inserted in the center comes out clean. Allow to cool in the pan for several minutes and then place on a wire rack to cool.


7.28.2009

Homemade Ice Cream So Fast Your Head Will Spin

So, I did this on the fly and I neglected to take pictures a.) prior to eating it and b.) before putting it in an unsightly plastic container, but this is such an easy thing to make, given that you have a blender or food processor and 5 minutes to spare. I was skeptical when I came upon the idea, but not having the motivation to bake and wanting something sweet, in I dove.

This would make the perfect complement to a cookout with friends. It takes so little time and no hot oven. It is sweet, fruity and fresh tasting. I am pretty sure I will make it again, as I've learned I have little patience for the ice cream maker we bought and the space it requires in our tiny freezer for lengthy periods prior to even making ice cream.

Fast and Delicious Homemade Ice Cream
(serves 3ish)
12 oz. frozen fruit (I used raspberries and blueberries, some I had frozen myself and some store-bought)
1/2 cup sugar
2/3 cup heavy cream (though yogurt or milk would surely work)
1/2 tsp. vanilla

Toss all ingredients into food processor bowl and let go until consistency is even and fruit is cut up. It should be the texture of soft serve.

Should you have leftovers, pop it into a freezer friendly container and press a layer of plastic wrap over it to prevent freezer burn and freeze.

6.25.2009

When life (or the CSA) gives you garlic scapes, make pesto!

We grabbed our 3rd CSA pick-up this afternoon to find some lovely strawberries, 3 adorable radishes, an enormous head of escarole, a bag of salad mix, a head of Romaine lettuce, more garlic scapes and some scallions.

Now, I like salad. I like it a lot. But, Luke doesn't. Not only does this make for a sad tatertot, it also makes for an overwhelmed one. My fridge is overflowing with greens! 2 heads of lettuce, that giant escarole(!) and a bag and a half of salad mix is a lot for one person to try to slog through. But, I digress. It will all get sorted out. We will eat salads (both of us!) this next week until it comes out our ears. We will also make soup from the Escarole of Doom.

Now, back to the matter at hand: garlic scape pesto.

Garlic scapes are also known as garlic tops. Because garlic reproduces asexually, it shoots up tall stalks with buds on them with the hope of going to seed. Farmers, wishing for that energy to go into growing plumper heads, lop them off and sell them. Prior to the discovery they could be eaten, they would be thrown away.

They taste like garlic with none of the rawness of a raw clove and they can be used in exactly the same way. Some even use them as you would green beans.

I choose to make pesto from them, using just a bit of parsley to up the 'green' flavor quotient. With said pesto, you can throw it on pasta, mix it with balsamic vinegar and make dressing, cover a pounded chicken breast with it and pan fry or scoop it up with crackers and eat as is.

Garlic Scape Pesto
1 scant cup garlic scapes, chopped
1/3 cup fresh parsley, coarsely chopped
1/3 cup pine nuts (pignoli if you're hardcore)
1/2 cup grated parmesan cheese
1/2 cup good quality olive oil

In the bowl of a food processor, combine the first four ingredients and pulse until everything is in tiny, uniform bits. Next, with the processor running, drizzle in the olive oil until combined and pesto-y. Eat!

6.20.2009

Infused Vodkas

Luke and I attended the wedding of 2 longtime friends yesterday and it was just lovely! The ceremony was held in the assembly chambers inside the Capitol building in Madison with the reception held just across the street at Brochach (pronounced broka). I hadn't planned on drinking, really, but I was won over by the open bar and the spectacular pineapple infused vodka they had. I could have chosen to have it on its own, but I chose to mix it first with a little orange juice and then with Sprite. I stopped after 2, like the responsible driver I am.

Thinking to myself that we've got a decent sized party coming up and the seeming ease of making such a libation, I decided to give it a go. There are plenty of recipes out there for infused vodkas, but I decided to wing it. I dragged Luke out of the house this morning in search of a large container with a spigot, a fresh pineapple or 2, some farm fresh strawberries and some cheap but drinkable vodka.

Walking out of the grocery store with 2 1.75 liter bottles of vodka made me feel like quite the sot. They don't know me! They can't judge me! "This is in the name of culinary greatness!" I longed to scream. Keeping my mouth shut and my head down, I paid for my purchases and returned to the car.

Upon arriving home, I got to work. I chopped up one of the pineapples, not bothering to core it, tossed the pieces into the container, poured in one of the bottles of vodka and sealed it up. Now, it sits for a couple of weeks and hopefully, it will be spectacular.

Having a spare bottle of liquor and an empty mason jar, I also sliced up some of the previously mentioned strawberries and did the same thing with them.

6.11.2009

Blueberry Scones and 1st Week CSA Share

Photobucket
Photobucket

I have been unusually busy of late and our social calendar has us doing something almost every weekend these days. This is our last (so far) empty weekend until the 11th of July. So if there's been a dearth of posts, it's due to my not having time. I am in the kitchen doing stuff, but I don't always remember to take photos or it doesn't come out as pretty as I'd like. (Note: I only share that which I deem cosmetically pleasing.)

Today was the 1st day in our 19 week CSA share season. A CSA is also called a farm share. You contact a local farm offering such a program, pay a set amount and end up with lovely farm fresh produce that varies throughout the season. Madison's own local organization (MACSAC) is a great resource if one happens to be interested in such a thing. They can answer a lot of questions and even have a low-income assistance program.

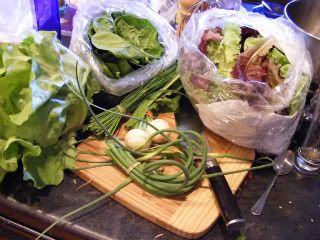
As seen in the photo, we received a head of lettuce, a huge bag of salad greens, a bag of spinach, salad turnips with their greens and a bunch each chives and garlic scapes. I am excited to see what the rest of the season brings and, after being anxious for this day since January, I was not disappointed.

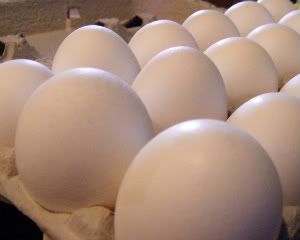
We also received a basil plant from our farm and it has taken up residence on the roof of Sjölind's Chocolate Haus with the herby cousins I'm cultivating (thyme, parsley, oregano, more basil and nasturtiums). The cousins are currently in micro stage and I did a bit of thinning yesterday. Luke was wondering what was taking so long when he came out to check on me. He found me hunched over a pot of basil saying, "I'm having to make Sophie's choice over and over again!". Fortunately, I was able to transplant the larger ones into another planter and I took the thinlings home as "microgreens" and used some both in my eggs (from another local farmer, we receive a dozen a week) this morning and on my salad with dinner.

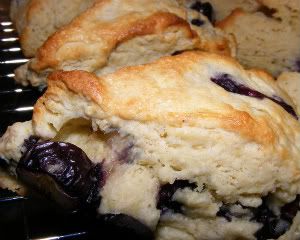
I've also been making a lot of scones lately. I tried my hand at blackberry and, while tasty, they were not pretty and the seeds were simply too large for me to really be rapturous about them. Then I tried blueberry and hit the jackpot. I've made 2 batches so far and they've both been delicious.

Photobucket

Blueberry Scones
(425* for 15-20 mins. - makes 8)


2 cups all-purpose flour
1/4 cup granulated sugar
2 tsp. baking powder
1/8 tsp. salt
6 Tbsp. chilled, unsalted butter
1 cup fresh blueberries, washed and picked over
1 large egg, lightly beaten
1 tsp. vanilla extract
1/2 cup milk

Preheat oven to 425* and line a rimmed baking sheet with parchment paper. In a medium bowl combine flour, salt, sugar and baking powder. Using the large hold of a box grater, grate the butter into the flour mixture and, using a pastry blender, fork or fingers, combine until the mixture resembles coarse crumbs.

Add liquid ingredients to dry and gently fold in blueberries. Turn dough out onto a lightly floured surface and knead 4 or 5 times for a cohesive dough. Press dough out into a 7" round and cut into six equal triangles. Arrange on baking sheet and brush with cream, sprinkling with demerara sugar if desired.

Bake scones 15-20 mins. until they are lightly browned. Remove from oven and cool on a wire rack. Serve warm with butter or at room temperature. They are excellent plain and I recommend freezing them should they sit around too long. Because of the fruit, they tend to mold a bit soon. I just take one at a time in the freezer and microwave it for 30 or so seconds at 40% power.


5.24.2009

Lemon Ricotta Tart

Tomorrow marks Memorial Day and the start of the grillin' season. To celebrate, we're heading down to the in-laws' for some grilled meats and sunshine in the backyard. It would seem that I am unable to visit someone without bringing along some sort of food or three. For this particular occasion, I chose potato salad (even though I really hate peeling eggs) and what was to be either lemon bars or a lemon tart. The time came this afternoon when the potato salad was complete and it was time to make a dessert. I looked at the recipe I planned on using for bars, compared it to the tart recipe and decided they were exactly the same thing using different presentation. Then, I started to wonder if I really wanted to use 10 eggs and 1 1/2 sticks of butter. I was willing to do it, but I knew there was something else out there. I settled upon a sweet tart crust courtesy of Smitten Kitchen with a minor tweak and a lemon ricotta filling. This reduced my egg usage to 3, butter to 1 stick and used only one lemon. The ricotta part came from having had a tub sitting in the fridge for a bit waiting for some pasta to come along and use it.

I clearly went way overboard in the decorating, selecting the best of the purchased blackberries, straining the seeds out of some raspberry jam and making artistic use of the pastry brush. A little thing I learned: when your only fine mesh sieve is dirty and you don't want to wash much more, a tea strainer does a fine job of evenly dusting confectioner's sugar. Stroke of genius!

It certainly looks pretty, but the recipe for filling made a perfect amount for filling the tart shell, so I have no idea how it will taste. The conclusion of that will have to wait until someone eats some.

Lemon Ricotta Tart
(375* for 25-30 mins to blind bake crust,
350* for 20-25 mins for completed tart)

For the crust:

1 1/2 cups all purpose flour
1/2 cup confectioner's sugar
1/4 tsp. salt
1 stick plus 1 Tbsp. cold butter, cut into small pieces
1 egg
1/2 tsp. almond extract

Place the flour sugar and salt in the bowl of a food processor and pulse 5 or so times to combine. Sprinkle the butter pieces over the flour mixture and pule 8 times or so until it resembles coarse cornmeal with some larger pieces of butter remaining. Add egg and almond extract and pulse just until it starts to stick together. This can be tested by pinching some between your fingers.

Turn out onto a lightly floured surface and roll out to fit into a 9" tart pan with a removable bottom. Gently place in tart shell, trim to 1/2" border (I fed the excess to Luke) and tuck border under to fortify outside crust. Place crust in the freezer for 30 mins. and preheat the oven to 375*.

When the oven is hot, place the pan on a rimmed baking sheet and, pressing to achieve a close fit, line the shell with aluminum foil. Bake for 20-25 mins., remove the foil and bake for another 5.

While the shell bakes, prepare the filling:

4 Tbsp. fresh lemon juice
the zest of 1 lemon
2 eggs
12 oz. ricotta cheese
1/4 c. sugar

Combine ingredients in a bowl and, when the tart shell has finished baking, remove it from the oven, reduce the temperature to 350* and pour in the filling. For a proper set, the tart shell should still be warm. Place the tart back in the oven and bake for 20 mins. until the middle wobbles just slightly. Remove from the oven and allow to cool completely. Dust with confectioner's sugar or decorate as desired.

Edit: Diagnosis? Delicious! One guest even told me she'd be willing to pay $40 for one. There wasn't a crumb left.

5.21.2009

New and Improved Sub Rolls!

I have a tendency to overcommit myself to the kitchen on weekends and when I have other things to do, I try to cram all of my projects into one day. This past Saturday, we went to Schaumberg for a giant mall/Ikea trip and I came home with some really snazzy woodland creature cookie cutters. Moose, anyone?

Anyway, with Saturday a cooking wash, I went nuts on Sunday. I made pizza sauce, cookies, rhubarb compote, raspberry jam and the bagels I mention below. By the end of the day (we even had a dinner guest for whom I made the cookies), I was pooped and may have to reevaluate just how crazy I am willing to go in the name of culinary exploration.

Back to the business at hand, I have been doing a lot more with bread lately and experimenting with what I can easily make at home and what I might want to stick with buying. So far, homemade wins almost all of the time given the right recipe and my having time. This past week alone, I have made honey whole wheat sandwich buns, bagels and now these beauties. I wasn't completely satisfied with the previous recipe I'd made since they turned out to be a bit salty. Sure, they have their applications, but I think these may be a superior all purpose roll for hot dogs, subs and, shaped differently, burgers. The recipe does require more ingredients, but nothing you can't find in a local supermarket. I found it in one of my bread machine books, this one by Beth Hensperger. We made some lovely meatball subs with them for dinner and they are a perfectly flavorful complement.

As previously stated, I am a cheater, but normal bread making rules apply.

Hamburger Buns and Hot Dog Rolls
(375* for 15-22 mins. - makes 8)

1 cup water
1 large egg
4 Tbsp. unsalted butter, cut into pieces
2 Tbsp. sugar
3 cups bread flour
1/4 cup nonfat dry milk
2 Tbsp. instant potato flakes
1 Tbsp. gluten
1 1/2 tsp. salt
1 3/4 tsp. yeast

Toss everything together in the bread pan and set for the dough cycle. When cycle ends, turn dough out onto a lightly floured surface and cut into 8 equal(ish) pieces. Shape as desired (6 in. oblongs for long rolls or tight rounds for burgers). Place them on a parchment lined baking sheet or, if you've run out of parchment, a buttered one sprinkled with cornmeal. Flatten each piece by pressing with your palm. Cover loosely with plastic wrap and allow to rest for 30 mins., preheating the oven during this time and running off to play Plants vs. Zombies.

Before placing them in the oven, glaze them with 1 egg yolk beaten with 1 Tbsp. water. If desired, sprinkle glazed rolls with 1 1/2 Tbsp. sesame seeds or poppy seeds.

Bake for 15 to 22 mins., depending on size, until lightly browned. Remove baked rolls from baking sheet with a spatula and cool completely on a wire rack.

5.11.2009

Mother's Day Brunch Pt. 1

I have a growing list of things I have recently made and fully intend to post, and before yesterday, this wasn't one of them! These scones were the result of my waking up early and fretting about how my quiche(s) would be received. I figured if no one liked the quiche, at least these would be there to save the day. I needn't have worried, but they turned out well, all 6 were eaten and they were quick to throw together with fairly minimal ingredients. Not only was everything well received, Luke really liked the scones, so I made a second batch just for him when we got home.

Most of the time when I am looking for a new recipe, instead of looking through my shelf full of cookbooks, I head to the internet knowing there are only 1,000,000 times more options out here than there are in my library. I often end up choosing things from Chow's forums. I really enjoy a good pumpkin scone, but didn't want one of the Starbuck's knockoffs. I settled upon one from Joy of Baking but I tweaked it a little. Theirs calls for both nuts and raisins, which are both tasty, but none of my eaters like them. It also calls for an egg wash and a dusting of coarse sugar. I thought a glaze with a little cinnamon and fresh grated nutmeg would be prettier, so I went with that. Next time, I might brush them with melted butter and sprinkle with sugar and cinnamon before baking.

Pumpkin Scones
(400* for 20 mins.
serves 6)

2 cups flour (I used bread flour because I was low on all purpose)
1/3 cup brown sugar
1/2 tsp. cinnamon
1/2 tsp. ground ginger

1 tsp. baking powder
1/4 tsp. baking soda
1/4 tsp. salt
1 stick butter
1/3 cup buttermilk (I use powdered and water)
1/2 cup pureed pumpkin
1 tsp. vanilla extract

Preheat oven to 400* and line a baking sheet with parchment paper. In a medium bowl whisk together dry ingredients and set aside. In a smaller bowl combine pumpkin, buttermilk and vanilla. Grate the stick of cold butter into the dry ingredients and blend with a pair of forks or a pastry blender until it resembles coarse crumbs. Add wet ingredients and stir until combined. Turn dough out onto a lightly floured surface and knead 4 or 5 times before shaping it into a disk about 7" around and 1 1/2" high. With a chef's knife or bench scraper divide into sixths and place on baking sheet. Place in oven and bake 20 mins. They will be puffed and just beginning to turn golden. After removing them from the oven, place them on a cooling rack and allow to cool, glazing if desired.

For the glaze:

1 cup powdered sugar
2 T. milk or cream
pinch nutmeg
pinch cinnamon

Combine ingredients in a bowl and mix until it forms a thick icing. Spoon over cooled scones and allow to set slightly.

5.06.2009

Sub Rolls

I decided last week that I was going to try making my own sub rolls. I had been pretty unhappy with the ones offered at the grocery store of late. They tend to be pale, gummy things that essentially taste like a really huge cotton ball. Usually when making bread, I just toss all my ingredients into the bread machine and let it work its magic. But, this project was going to require me to get my hands a little dirty. Granted I allowed the machine to make the dough for me, but the shaping and second rise were up to me. They turned out incredibly well. Well enough for me to make a second batch the next day and double it! They are crusty and flavorful, well worth the time it took. Better yet, it only takes 4 ingredients!

While I am a cheater, standard bread making rules will easily apply with regards to kneading, rising and punching down.

Sub Rolls
(makes 4-8" rolls)


3 cups bread flour
1 cup water
2 tsp. salt
1 T. yeast

Toss all ingredients into bread pan and set for the dough cycle. When the cycle completes, remove dough and place on a lightly floured surface. Divide evenly into 4 parts and roll into 4 8' inch oblongs. Place the oblongs about 2-3" apart on a baking sheet lined with parchment paper and cover with a clean kitchen towel. Place the baking sheet in a draft free place for about an hour (I use my oven). 20 minutes prior to the end of the rising, remove the baking sheet and preheat the oven to 450*. When the oven comes to temperature, remove the kitchen towel and put the rolls in to bake for 5 minutes, either spritzing the oven with a spray bottle or tossing in a couple of ice cubes. After 5 minutes, lower the oven temperature to 400* and spritz/ice cube again, this time baking for 15 minutes. Remove from the oven and cool on a wire rack.

Edited to add: As it turns out, these are actually a bit salty for any application other than a cheesesteak. I have found a better, lighter roll with less salt that suffices beautifully.

5.04.2009

Homemade Granola


I have long read about how easy and economical it is to make granola at home, but I always just figured it was more difficult than I was told. So, this past week, Luke was trolling around the web and found a granola recipe for me. I looked at it and some others, but found none of them to be exactly what I wanted. It was up to me to create something I would want in a healthy, cereal that uses no high fructose corn syrup. I had some blanched almonds kicking around and a bit of sweetened coconut. A good granola also has to have the proper amount of sweetness, oats and dried fruit, so I replenished my supply of rolled oats and picked up a couple of pouches of dried cherries, cranberries and blueberries, figuring those would make a nice change from the old school raisins.

It turned out quite tasty and the making of it went incredibly quickly. I even had a bowl for breakfast yesterday!

Homemade Granola
(Makes 1 gallon zipper lock bag)


4 cups old fashioned rolled oats
2 cups chopped nuts
2 cups sweetened coconut
1 1/2 cups dried fruit, chopped
1/2 cup canola oil
1/3 cup honey
2 tsp. cinnamon

Preheat oven to 350* and combine all ingredients in a bowl, stirring to coat everything evenly with liquids. Pour onto a baking sheet and bake 20-25 mins., stirring occasionally with a spatula, until everything is a light golden brown. Remove from oven and allow to cool completely, stirring occasionally to prevent too much sticking and store in an airtight container.

(6.25.09) I made this a second time and made a couple of tweaks. I upped the sweetness a bit by adding 1/3 cup brown sugar and a little over 1 tsp. of vanilla. Also, instead of allowing the fruit to bake with everything else, I tossed it on when I pulled it out of the oven. Dried fruit is already a bit chewy and baking it makes it a lot harder to chew, so best not to expose it to extra heat. I also lined the baking sheet with parchment to ease cleaning. The first time was tasty, the second a taste sensation!

5.03.2009

Tres Leches Cake and the Taco Experience


Last night we had guests over for dinner. One of the guests and Luke dubbed it the Taco Experience. While I argued that it sounded like the tacos would be roofied, the moniker stuck and it's supposed to become some sort of recurring event.

For the evening, we made tacos of both pork and tilapia, the previously posted slawlsa, mango guacamole, refried black beans, chile con queso and brown rice Mexican style. Everything was homemade and very tasty, having been dubbed a success.

For dessert, I wanted to do something that would go along with the Mexican theme and chose a Tres Leches Cake. I combed through a number of recipes and finally settled upon that of Alton Brown. The ingredients were fairly limited and also comprised mostly of things I had on hand. I served it with diced mango.


Tres Leches Cake
(350* for 20-25 mins. and
makes 1-13x9 in. cake)

For the cake:

Vegetable oil
6 3/4 oz. cake flour, plus extra for the pan
1 tsp. baking powder
1/2 tsp. kosher salt
4 oz. (1 stick) unsalted butter at room temperature
5 eggs
8 oz. sugar
1 1/2 tsp. vanilla extract

Preheat the oven to 350 and grease and flour the pan. In a medium sized bowl, whisk flour, baking powder and salt together and set aside.

Using a stand mixer, place the butter in the bowl and beat with the paddle attachment on medium speed for about 1 minute until light and fluffy. Decrease the speed to low and with the mixer still running, gradually add the sugar over 1 minute. Stop to scrape down the sides of the bowl, if necessary. Add the eggs, 1 at a time, and mix to thoroughly combine. Add the vanilla extract and mix to combine. Add the flour mixture to the batter in 3 batches and mix just until combined. Transfer the batter to the prepared pan and spread evenly. This will appear to be a very small amount of batter. Bake on the middle rack of the oven for 20 to 25 minutes or until the cake is lightly golden and reaches an internal temperature of 200 degrees F.

Remove the cake pan to a cooling rack and allow to cool for 30 minutes. Poke the top of the cake all over with a skewer or fork. Allow the cake to cool completely and then prepare the glaze.


For the glaze:

1 can evaporated milk
1 can sweetened condensed milk
1 cup half and half (I used heavy cream because it was in the house already.)

Mix these in a bowl and pour over the perforated cake, allowing it to sit overnight in the fridge.

(Now, I actually found that the cake did not absorb about 8 oz. of this mixture, so if you're sporting, you can adjust the amounts before combining them, or do what I did and siphon off the excess liquid with a turkey baster, transferring it to a container to use later on in coffee or tea or something.)

The topping is really easy to make and incredibly tasty, but is ultimately entirely optional. It does make it look very pretty, though.

For the topping:

8 oz. sugar
2 cups heavy cream
1 1/2 tsp. vanilla extract

Again putting the trusty Kitchen Aid to use and using the whisk attachment, mix on low speed until it forms stiff peaks. This can take some time, so feel free to do something else kitcheny and just remember to keep an eye on it. When stiff peaks are achieved, turn it up to medium until thick. Spread evenly over the top of the cake and enjoy!

5.02.2009

Saturday Egg Scrambler


This is something I have started making since we're now getting a weekly dozen organic eggs from a local farmer. It's not so often that we can go through a dozen in a week, but it's definitely easier when they're as good as these are. It's basically a slipshod version of migas, which is a Spanish/Mexican egg dish made with sausage, eggs and breadcrumbs/tortillas. Instead of either of those starches, I usually bake a couple of baby red potatoes in the microwave and dice them.

You can basically throw in whatever you have handy and seems good at the moment, but I do shallots or onions, some favorite herbs and cheese. Today I had some bulk breakfast sausage lying around and some leftover red bell pepper, so those went into the pan, too.

A majority of our dried herbs come from Penzey's, to the point where we have an entire cabinet shelf stocked with little glass jars and a drawer full of bulk sacks. Their prices are reasonable and you can find just about anything you're looking for, no matter the cuisine. I used their Bouquet Garni blend for this.

I didn't measure anything, but I'll try to come up with an approximation.

Saturday Breakfast Scrambler
(Serves 2-3)

1 finely minced shallot or 2 T. onion
3 small red potatoes, baked in microwave
2 oz. breakfast sausage, cooked (can cook in pan prior to adding shallot/onion)
2 T. red bell pepper, 1/4 inch dice
3 eggs
1-2 T. cream
1 oz. grated/crumbled cheese of choice (I used a leftover blend of Jack and cheddar)
1/2 tsp. dried herbs
1/4 tsp. garlic powder
Salt and Pepper to taste

Melt a small amount of butter over medium heat in a mid-sized skillet. Add shallots and bell pepper, cooking until shallot is translucent and pepper softens slightly. Add diced potato, sausage and garlic powder, allowing potato and sausage to heat. Meanwhile, crack eggs into a small bowl, add cream and herbs and whisk with a fork until color is consistent. Push vegetable/sausage mix to one side of pan and pour egg mixture into empty portion. Scrape the bottom of the pan gently to form soft curds. (Some of the egg mixture will seep into the veggie territory and that's fine.) When eggs appear to be about halfway done, bring the veggie/sausage half back into the mix and sprinkle with cheese, allowing it to melt. Divide onto plates and serve with buttered toast or English muffin.

Slawsa


Here we are, on the day of the Taco Experience. Since I'm in charge of the fish, I made some slaw/salsa for the topping last night.

I cribbed most of the recipe from the Bluphie's black bean and corn salsa, but I left out the black beans and added some red cabbage in place. The original recipe wasn't citrus-y enough for my taste, so I also put more lemon juice as well as calamansi vinegar. Also no cilantro, but you knew that.


Luke's Slawsa:

¼ red cabbage, run through the mandolin
½ c corn kernels
1 small onion, diced
about a teaspoon of ground chipotle
a clove of garlic, smashed
2 t olive oil
2 T calamansi vinegar
1 lemon's worth of juice
½ t cumin
salt + pepper

Stick everything in a mason jar. Shake it up. Let it marinate overnight.

4.29.2009

Kristin's Kick Ass Banana Bread


I make a lot of things from scratch. Things that other people are more than happy to go to the store and purchase. Some of these things include yogurt, bread, jam and vanilla extract. I also grind my own meat using that grand old kitchen workhorse, the Kitchen Aid mixer (with grinder attachment). My reasons for doing this are rooted in bone-deep frugality and a desire to know precisely what is going into the things I consume on a regular basis. Plus, they all take so little time that it's almost silly not to. I will readily admit that I have help in the form of various kitchen electrics, but the satisfaction of digging into something for which you know every speck is unparalleled.

Every 3 or 4 months, I experience a banana kick. I eat 1 or 2 a day for several weeks at a time, but my freshness window is very narrow. I prefer them just yellow with no brown spots, so they tend to go by long before I get to them. My solution for this is simple and Luke hates it, but I wait for them to get completely brown on the counter and then I stow them in the freezer for later use in baking. When a day like today comes along, I pull a few of them out, let them thaw (either in the microwave for a minute or two or on the counter for an hour or so), cut the tops off with a pair of kitchen shears and squeeze them like a toothpaste tube into whatever recipe calls for them.

I came home today without any intention of baking until I realized that I had a couple of bananas on the counter that were ready for the freezer. Instead of popping them in there, I used them to make the title recipe, given to me by my friend and former coworker, Kristin.


Kristin's Kick Ass Banana Bread
(350* oven for up to an hour or, 20-30 mins. for muffins)

1 c. whole wheat flour
1 c. unbleached all purpose flour
1 tsp. baking powder
1 tsp. baking soda
1 c. sugar
1/2 tsp. salt
1/4 c. wheat germ
1/2 c. ground pecans (walnuts can also be used)
1/2 c. chocolate chips (optional)

2/3 c. vegetable oil (I use canola)
1 c. sugar
2 eggs
1/4 c. milk, sour cream or yogurt
3 or 4 mashed overripe bananas

Combine dry ingredients and set aside. Combine wet ingredients until well mixed and add to dry. Mix just until combined and our into prepared pan. Bake until toothpick or cake tester comes out clean.

4.28.2009

A Beginning of Sorts


Since I seem to always be posting about food in some form or another, I figure I might as well go for it and start a (nearly) food exclusive blog. I've been cooking as long as I can remember, whether standing on a footstool to peel apples for my grandma when I was little or finding myself a self-sufficient adolescent with a knack for apt pairings.

I am a collector of cookbooks and family recipes. I cook a lot on the weekends while my husband usually takes care of dinner during the week. For fun, he experiments with molecular gastronomy and I take to more traditional recipes handed down through generations not just of my family but of anyone who is willing to share.

I enjoy it because it gives my brain and hands something to do, I really like feeding people and the results are often very nice looking. I take a lot of food pictures. Living on a limited budget forces you to be creative with quotidienne ingredients.

Recent outings have included a Dark Chocolate Cheesecake, Peanut Butter Pie, queso that would make you kill your own mother to get one more chipful and a lovely veggie quiche I lunched on for a week.

Something to know: I use real butter, cream and sugar. I don't cut corners and I learned not to be afraid of food a long time ago. Fear keeps you from enjoying a lot of things. Fearing something you have to do so regularly as eating is no way to live life.